Running Animate-X on Google Colab for Free
Animate-X is an image animation AI tool for animating an image using a driving video. Many believe that running advanced AI animation tools like Animate-X requires high-end hardware. However, with the right optimizations, you can harness the power of Google Colab’s free T4 GPU to bring animations to life. This guide walks you through every step, from accessing the Animate-X Colab notebook to configuring the best settings for smooth performance. Whether you're a creator experimenting with AI driven animations or simply exploring new tools, this tutorial will help you get started efficiently.
Accessing the Animate-X Colab Notebook
The first step is to visit the Google Colab Notebooks GitHub repository It will appear as shown below.
Next, locate the Animate-X Colab notebook and click on 'Open in Colab' to launch it as shown below.
This will open the notebook in Google Colab, where all the necessary code is pre-written and ready to execute.
Connecting to the Free T4 GPU
First, connect to a T4 GPU by following these steps:
- Click on the dropdown beside 'Connect' in the Colab menu as shown above.
- Select 'Change runtime type'.
- Under 'Hardware accelerator', choose 'T4 GPU'.
- Click 'Save'.
This step ensures that the notebook can leverage the available GPU resources for the animation.
Downloading Required Models
Run the first code block as shown above to install all necessary packages and download the required five models. The Animate-X model itself is over 7GB in size, so this step can take approximately 11 minutes. Once complete, you will see the message, "All models are ready!" as shown below.
Uploading the Reference Image and Driving Video
Next, run the code block under Load Inputs & Generate DWPose Data as shown above. This will output a menu as shown below which you can use to upload the image and the driving video. It's advisable that your image shows the full front view of the person with all their limbs visible. The video should contain only one person and the background should be stationary for best results.
When you are done uploading the image and video, you will see Upload (1) as shown below, indicating you have uploaded 1 image and 1 video. You can now click on Extract DWPose.
For a 32-frame video, this process should take about 16 seconds. On completion, you will see the message, 'DWPose data extraction complete!' as shown below.
Inference Parameters
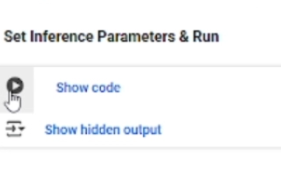
Next, run the code block under Set Inference Parameters & Run as shown below.
This will display a menu as shown below.You can adjust the parameters before running the inference by following this guideline;
- Max Frames: This should be set equal to or less than the total frames in the video to avoid runtime errors.
- Resolution: Make sure both values are divisible by 64.
- Round: I have only tested this with a value of 1. You can experiment with other values.
- DDIM Steps: Lower values, such as 20, can reduce inference time but may affect quality.
- Seed: You can experiment with different seed values.
- FPS: You can set this to be the same as the driving video.
- Frame Skip: Determines whether to use every frame (set to 1) or skip some frames(Set greater than 1). Higher values will result in fewer frames being used. If the driving video has 64 frames and you set this to 2, then the output video will have 32 frames. If the driving video plays at 30fps, then you can set the FPS parameter to 15 in this situation to maintain the duration of the video, and the Max Frames parameter must not exceed 32.
When you are done with setting the parameters, you can click on Run Inference. The process typically takes between 9 to 12 minutes, depending on the length of the video. Once completed, the animated video will be displayed.
Observations and Considerations
- Animate X resizes input images to 512×768, which may alter body proportions.
- If certain body parts do not move as expected, adjustments may be required. Previous tutorials on Animate X provide solutions for these issues.
- Testing shows that the T4 GPU can process up to 44 frames without memory issues. Exceeding 51 frames results in an out-of-memory error. The input image and video sizes may also influence performance. To run more frames, then you will need to buy compute units or a subscription to use bigger GPUs.
Conclusion
This guide demonstrates that running Animate X on Google Colab for free is not only possible but also efficient when using the right optimizations. Future updates will include a Colab notebook for reposing images with UniAnimate. Follow me for further developments and additional tutorials on AI animation.
.png)
.png)
.png)
.png)


Comments
Post a Comment